To swap a HDD PCB (Printed Circuit Board), please follow these general steps:
- Ensure you have the necessary tools: a compatible replacement PCB, a screwdriver, and an anti-static wristband.
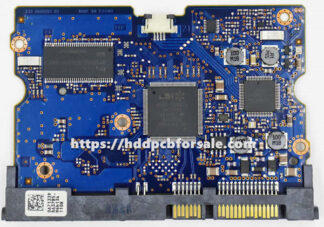
- Seagate replacement PCB must have the same “PCB Number” as your original PCB.
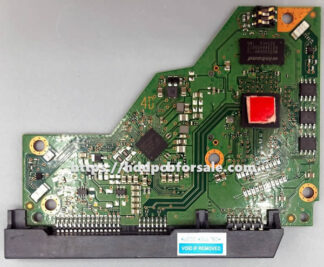
Seagate HDD PCB swap - WD replacement PCB must have the same “PCB Number” as your original PCB.
WD HDD PCB swap - Samsung replacement PCB must have the same “PCB Number” as your original PCB.
Samsung HDD PCB swap - Toshiba replacement PCB must have the same “PCB Number” as your original PCB.
Toshiba HDD PCB swap - Fujitsu replacement PCB must have the same “PCB Number” as your original PCB.
Fujitsu HDD PCB swap - Hitachi 2.5″ HDD replacement PCB must have the same number of the “White Label” as your original PCB.
Hitachi 2.5″ HDD PCB swap - Hitachi 3.5″ HDD replacement PCB must have the same number of the “Main Controller IC” as your original PCB.
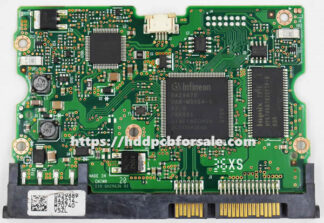
Hitachi 3.5″ HDD PCB swap - Maxtor replacement PCB must have the same number of the “Main Controller IC” as your original PCB.
Maxtor HDD PCB swap - Power down and unplug your computer to avoid any electrical damage.
- Open your computer case and locate the hard disk drive (HDD) with the faulty PCB.
- Carefully disconnect the cables connected to the HDD, including the power and data cables.
- Remove any screws or brackets securing the HDD in place and gently remove it from the computer.
- Unscrew and remove the faulty PCB from the HDD, taking care not to touch any of the electronic components.
- Attach the replacement PCB to the HDD, aligning it properly with the screw holes.
- Secure the replacement PCB with screws, ensuring it is firmly connected to the HDD.
- Reconnect the cables to the HDD, including the power and data cables.
- Carefully place the HDD back into its original position in the computer case and secure it with screws or brackets.
- Close the computer case and reconnect the power cable.
- Power on your computer and check if the HDD is recognized by the system.
- If the HDD is recognized, ensure that all data is accessible and perform a thorough backup as soon as possible.
Swap HDD PCB BIOS chip: In most cases, we also need to swap the BIOS chip (as shown below. Otherwise, the hard drive cannot be correctly recognized by the computer after the PCB replacement). You first need to desolder the chip from the old PCB board (with the tool hot air station). Do the same with the new board. Finally, solder the old BIOS chip to the new PCB.

Tip: If you don’t have the right tools and technology, you can also find a local phone, TV and electronics repair shop to help you, the cost of this service is around $20.
Note: Swapping a HDD PCB should be done by experienced individuals or professionals, as it involves handling sensitive electronic components. It’s also important to ensure compatibility between the replacement PCB and the HDD to avoid further issues.